 A green, mossy roof might look like something out of a fairy tale, but in reality, a mossy roof is far from magical. In fact, moss presents a hazard to the structure of your roof, and if you allow it to grow unchecked, it can slowly degrade your roof, shortening its lifespan.
At Bert Roofing Inc., we’re here to help you get the most out of your roof, and to do that, we want to tell you about the importance of regular maintenance. If your roof is prone to developing organic growths, you’ll need to keep up with regular moss removal. Here’s how to remove moss from your roof and help keep it from returning:
1. Gather the Necessary Tools
Before you get started, gather the necessary materials and tools you’ll need to safely and successfully remove moss from your roof. Here’s what you’ll need:
- Extension ladder
- Rubber gloves
- Garden hose with a spray nozzle
- Safety glasses
- Safety rope
- Non-slip shoes
- Heavy-duty cleanser
- Large spray bottle
- Soft-bristled scrub brush (a long-handled one is best)
If you want to protect the ground or landscaping around the perimeter of your home, it’s a good idea to lay down plastic sheeting over any plants that may be sensitive to chemicals. Spray cleansers can also discolor siding, walkways, and decks, so you may want to spread plastic sheeting over those areas as well.
2. Hose Off and Gently Scrub the Roof
Before you get started, be sure to don slip-resistant footwear for extra protection while you’re working on the roof. Toss on some old clothing, and for safety’s sake, wear protective gloves and eyewear. Now you’re ready to begin.
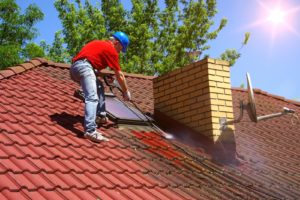
First, situate a ladder near the area where the moss is growing. It’s a good idea to use a safety rope to help keep you from falling. Climb up the ladder, and using your garden hose with the spray nozzle, hose off the moss growth with plain water, doing your best to spray at a downward angle.
Next, grab your soft-bristled scrub brush and gently scrub from the top of the moss growth downward to avoid accidental shingle lifting. Working in small areas, avoid pounding, scraping, or scouring the roof. Otherwise, you might dislodge the protective granules on your shingle or break the shingles altogether. Depending on the severity of the moss growth, a basic rinse and scrubbing may get rid of it completely. If you can still see moss or residue from organic growths after a gentle scrub, move on to Step 2.
Please note: In most cases, pressure washers should not be used for roof cleaning. The highly pressurized jet of water can easily damage shingles, especially if your roof is on the older side.
3. Apply Cleaning Solution to the Roof
If a simple scrubbing wasn’t enough to remove the moss on your roof, you’ll need to apply a heavy-duty cleanser to tackle the remainder of the growths. If you’re the DIY type, you can make an effective roof cleaning solution using items you may already have around the house. Here are a few different options:
- A 50-50 mixture of household bleach and plain water
- 2 gallons of water mixed with 8 ounces of high-quality dish soap
- 2 gallons of water combined with 1½ to 3½ cups of white vinegar
- 2 gallons of water mixed with 1 pound of powdered oxygen cleanser
If you prefer a premade cleanser, there are a wide variety of commercial options you can purchase at your local home improvement store.
Before you apply the cleaning solution to the roof, make sure it’s overcast outside. If you perform this step on a sunny day, the solution will evaporate too quickly and fail to effectively break down the moss. If you’re using a commercial solution, follow the manufacturer’s application directions. Certain cleaning products must be rinsed off after application, while others should be left on the roof.
If you’re opting for a homemade cleanser, you’ll want to hose down the roof with plain water prior to applying the cleaning solution. After application, let the cleanser sit for approximately 20 to 45 minutes before gently scrubbing the roof with your soft-bristled brush. Rinse the remaining cleanser and any organic material off the roof with your hose’s sprayer attachment.
4. Prevent Future Moss Growth
You can prevent future moss growth by installing zinc- or copper-coated strips just below the apex of the roof on both sides. Copper and zinc are toxic to moss and algae, and a few simple strips of metal will help keep the structure clear of organic growths.
Though this step is optional, it’s highly recommended, especially for homeowners who have difficulty keeping up with routine roof maintenance. If you’d like to err on the more affordable side, opt for zinc since it’s less expensive than copper. However, if you want the best protection against moss and algae, stick with copper. It’s more toxic to organic growths than zinc.
Lastly, if you have any large trees that cast shade on your roof or any tree branches that extend over the top of your house, consider trimming them back. The ultraviolet rays from natural sunlight are highly effective at preventing organic growths.
If you need a hand with roof maintenance, don’t hesitate to get in touch with our team at Bert Roofing Inc. We specialize in comprehensive roof maintenance, replacement, new installation, and repairs, and we pride ourselves on our commitment to excellent customer service and quality workmanship. To schedule an appointment or learn more about our services, feel free to call our office today at 214-321-9341 or send us a message, and we’ll get back to you promptly.
